


Never Miss a Beat: Get a snapshot of the issues affecting the IT industry straight to your inbox.
Read this chapter of <i>A Practical Guide To Ubuntu Linux</i> and bring yourself up to speed on the open source operating system's desktop and its root privileges, and learn how to work with the command line and control windows.
10 Min Read

Chapter 4: Introduction To Ubuntu Linux
|
In this chapter:
Curbing Your Power: root Privileges/sudo
A Tour of the Ubuntu Linux Desktop
The Update Notifier
Updating, Installing, and Removing Software Packages
Where to Find Documentation
More About Logging In
What to Do If You Cannot Log In
Working from the Command Line
Controlling Windows: Advanced Operations
| |
| |
One way or another you are sitting in front of a computer that is running Ubuntu Linux. After describing root privileges, this chapter takes you on a tour of the system to give you some ideas about what you can do with it. The tour does not go into depth about choices, options, menus, and so on; that is left for you to experiment with and to explore in greater detail in Chapter 8 and throughout later chapters. Instead, this chapter presents a cook’s tour of the Linux kitchen: As you read it, you will have a chance to sample the dishes that you will enjoy more fully as you read the rest of this book.
Following the tour are sections that describe where to find Linux documentation (page 124) and offer more about logging in on the system, including information about passwords (page 132). The chapter concludes with a more advanced, optional section about working with Linux windows (page 139).
Be sure to read the warning about the dangers of misusing the powers of root (sudo) in the next section. Heed that warning, but feel free to experiment with the system: Give commands, create files, click objects, choose items from menus, follow the examples in this book, and have fun.
tip: | root terminology As installed, Ubuntu has a root account but no password for the account: The root account is locked. The next section explains how you can use sudo and provide your password to run a command with root privileges. This book uses the phrase "working with root privileges" to distinguish this temporary escalation of privileges from the classic scenario wherein a user can work with root privileges for an entire session. See page 487 for more information on root privileges. |
Curbing Your Power: root Privileges/sudo
When you enter your password to run a program (not when you log in on the system), or when you use sudo from the command line, you are working with root privileges and have extraordinary systemwide powers. A person working with root privileges is sometimes referred to as Superuser or administrator. When working with root privileges, you can read from or write to any file on the system, execute programs that ordinary users cannot, and more. On a multiuser system you may not be permitted to run certain programs, but someone—the system administrator—can and that person maintains the system. When you are running Linux on your own computer, the first user you set up, usually when you install Ubuntu, is able to use sudo and its graphical counterpart, gksudo, to run programs with root privileges.
security: | Who is allowed to run sudo? In this chapter and in Chapter 8, when this book says you have to enter your password, it assumes you have permission to administer the system. If not, you must get an administrator to perform the task. |
There are two primary ways to gain root privileges. First, when you start a program that requires root privileges, a dialog box pops up asking you to Enter your password to perform administrative tasks. After you enter your password, the program runs with root privileges. Second, if you use the sudo utility (for textual applications; page 490) or gksudo utility (for graphical applications; page 491) from the command line (such as from a terminal emulator; page 114) and provide your password, the command you enter runs with root privileges. In both cases you cease working with root privileges when the command finishes or when you exit from the program you started with root privileges. For more information refer to "Running Commands with root Privileges" on page 487.
caution: | Do not experiment while you are working with root privileges |
security: | If you bought your system with Ubuntu installed at the factory |
A Tour of the Ubuntu Linux Desktop
This section presents new words (for some readers) in a context that explains the terms well enough to get you started with the Ubuntu desktop. If you would like exact definitions as you read this section, refer to "GNOME Desktop Terminology" on page 105 and to the Glossary. The Glossary also describes the data entry widgets (page 1068), such as the combo box (page 1029), drop-down list (page 1035), list box (page 1045), and text box (page 1064).
GNOME
GNOME (www.gnome.org), a product of the GNU project (page 4), is the user-friendly default desktop manager under Ubuntu Linux. KDE, the K Desktop Environment, is a powerful desktop manager and complete set of tools you can use in place of GNOME. The version of Ubuntu that runs KDE is named Kubuntu. See page 60 for instructions on installing KDE.
This tour describes GNOME, a full-featured, mature desktop environment that boasts a rich assortment of configurable tools. After discussing logging in, this section covers desktop features—including panels, objects, and workspaces—and explains how to move easily from one workspace to another. It describes several ways to launch objects (run programs) from the desktop, how to set up the desktop to meet your needs and please your senses, and how to manipulate windows. As the tour continues, it explains how to work with files and folders using the Nautilus File Browser window, one of the most important GNOME tools. The tour concludes with a discussion of the Update Notifier, the object that allows you to keep a system up-to-date with the click of a button; getting help; and logging out.
Logging In on the System
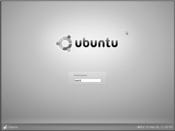
When you boot a standard Ubuntu Linux system, it displays a Login screen (Figure 41) on the system console.
| Figure 4.1 |
At the lower-left corner of the screen is a small object labeled Options. Click this object or press F10 to display the Actions menu. The selections on this menu allow you to work in a different language (Select Language), specify a desktop manager (Session), log in remotely, reboot the system (Restart), turn the system off (Shut Down), suspend the system, or have the system hibernate. For more information refer to "The Login Screen" on page 132.
To log in, enter your username in the text box labeled Username and press RETURN. The label changes to Password. Enter your password and press RETURN. If Ubuntu displays an error message, try entering your username and password again. Make sure the CAPS LOCK key is not on (Ubuntu displays a message if it is); the routine that verifies your entries is case sensitive. See page 133 if you need help with logging in and page 135 if you want to change your password. The system takes a moment to set things up and then displays a workspace (Figure 42).
Note: To read this chapter in it's entirety: Download the PDF file.
 Mark G. Sobell is the author of best-selling UNIX and Linux books, including A Practical Guide to the UNIX System, UNIX System V: A Practical Guide, and A Practical Guide to Linux. He has more than twenty years of experience working with UNIX and Linux and is president of Sobell Associates Inc., a consulting firm that designs and builds custom software applications, designs and writes documentation, and provides UNIX and Linux training and support.
About the Author(s)
You May Also Like
More Insights
Editor's Choice


May 2, 2024
While there are plentiful options in cyber resiliency and business continuity tools and platforms, there isn’t one that can knock out everything from sudden cloud outages to prolonged ransomware attacks in a single punch. What can you do to keep the company on its feet no matter what is thrown at it? Find out in this new virtual event.
Reserve Your Seat Now